Using the Zendesk for Visual Studio Online integration
TechEd NA’s recent announcements about Visual Studio Online (VSO) Service Hooks and REST APIs, will make us believe the sky is the limit regarding integrations between VSO and external services and applications.
The REST API not only allows to get and manipulate data on VSO from a multi-platform perspective but the Service Hooks will enable applications to get notifications about changes on VSO in real time.
But I’m digressing; this isn’t about the APIs nor the service hooks capabilities, but of a particular scenario that has been implemented using these new capabilities.
One of the available service hooks that is available is Zendesk. Using service hooks, paired with a Zendesk app we are now able to reduce the gap between the support team using Zendesk to doing customer care and the development team workflow that is using VSO.
This integration is enabled by using a Zendesk app that allows the support team to better collaborate by escalating tickets to the dev team directly from Zendesk without the need for swivel chair integration.
The app is available as open source in Codeplex’s project the Visual Studio Online App for Zendesk and can be installed on your Zendesk account.
For example, when a customer reports a bug, the agent can create a work item in VSO directly from Zendesk. After fixing the bug, a developer can add a comment to the ticket directly from Visual Studio Online. An agent can also notify developers by adding comments to the work items without leaving Zendesk.
The main purpose of this post is to show how to setup and use the Zendesk for Visual Studio Online integration.
Setup integration
The setup process consists of:
- Installing the Zendesk application in Zendesk
- Creating a Zendesk service hook subscription in Visual Studio Online
Install application in Zendesk
To install the application you must first download the latest version of the application zip package from CodePlex. You can install the app in Zendesk by navigating to APPS à Manage and clicking in the Upload App button.
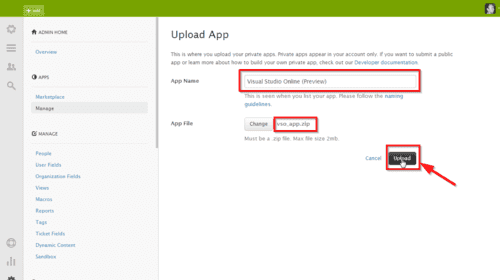
Before starting the installation process, Zendesk requires you accept the license. After the upload is done we will be redirected to the settings page to configure the app:
- VSO account name à VSO account name, like in https://<account_name>.visualstudio.com.
- VSO work item tag à the tag that will be applied in VSO to linked work items. This tag will be used in Visual Studio Online when a work item is created directly from Zendesk.
- Enable role restrictions? àselect which roles (administrator, agent) have access to the app
The tag is optional, but by defining a tag you can easily find which work items have been escalated from Zendesk with the use of a query. Furthermore, it also allows you to quickly see on the backlog which work items have been originated from Zendesk (by showing the tags columns)
Fill the settings and click Install.
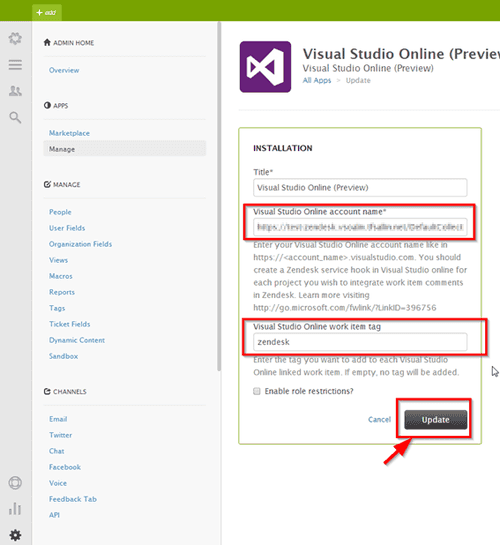
The app is now installed.

Creating a Zendesk subscription in Visual Studio online
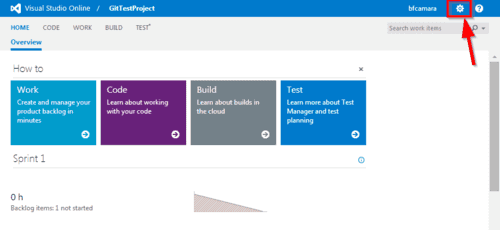
To create a new service hook subscription, in the VSO project portal, we need to go to the a project control panel by clicking the cog icon (any project will do)
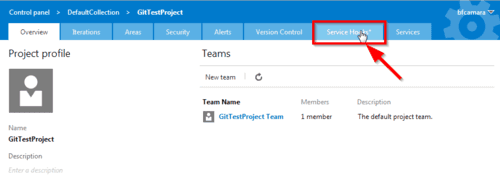
In the project’s control panel, choose the tab Service Hooks
Then, click on the link “Create the first subscription for this project”

Start by creating a new service hook subscription by choosing Zendesk as the target service
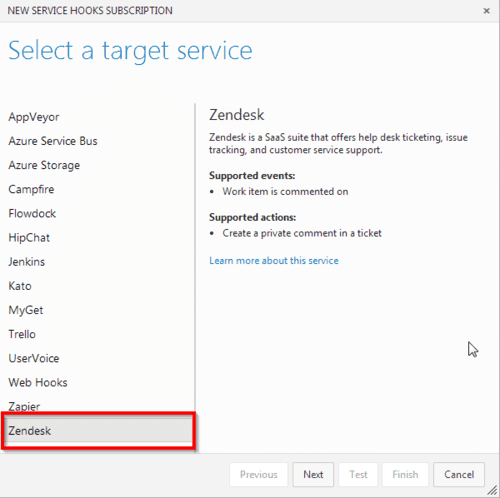
The Zendesk service hook provides just one action to create a private comment in a Zendesk ticket. This action only supports the event “Work item is commented on”, and before creating a private comment in Zendesk, it performs additional checks:
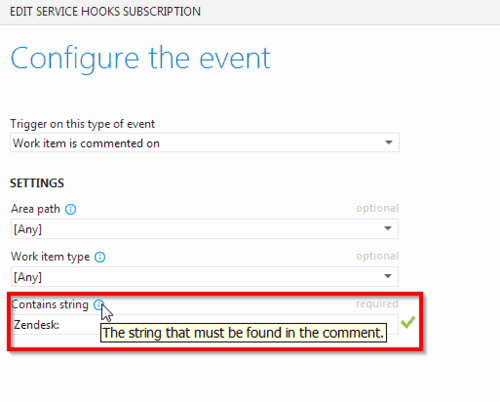
- The comment should start with the pattern defined in the field “Contains only”. When defining a subscription to events “Work item is commented on”, one required parameter is the “Contains string” field.

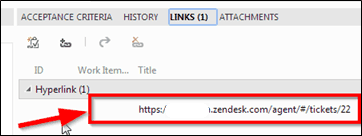
- The comment should be related with a Zendesk ticket. The relation is defined using hyperlinks, which means that a given work item is related to a Zendesk ticket if it has in its links a hyperlink to the URL of the ticket details page in Zendesk agent app. (don’t worry this relation is created automatically by the app when the work item is created on VSO, no manual intervention is needed)
When registering the subscription, the following Zendesk inputs will be asked:
- The Zendesk account name
- User name
- API token
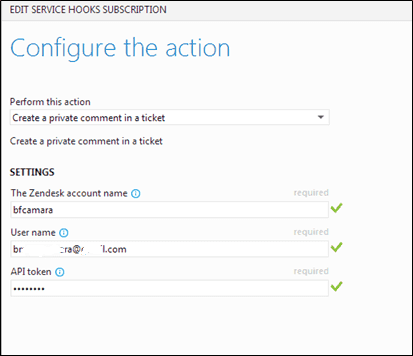
Zendesk account name
The Zendesk account name is the subdomain part of the URL used to access the Zendesk account like in https://<account_name>.zendesk.com
Zendesk user name
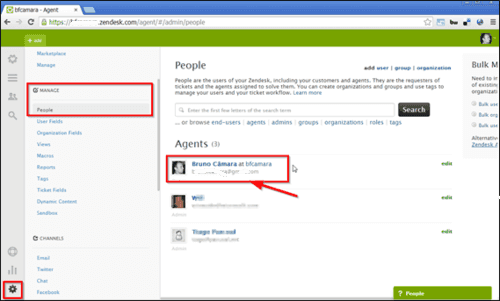
The Zendesk user name is the email address of the agent that will be used to perform the integration (this can be seen as the integration account which will be used to perform operations on Zendesk). The list of available users can be viewed in People menu option in the Manage group.
API token
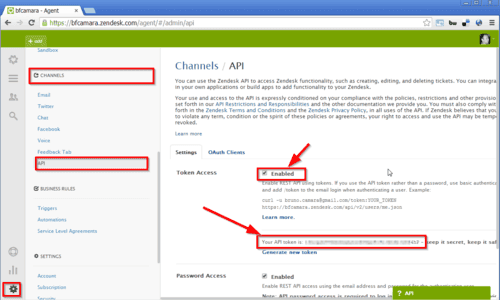
The API token is the Zendesk API authentication token for the agent who will perform the integration. To be able to use API tokens a user must explicitly enable access with tokens, which can be done using the API menu option inside the Channels group
We have now a Zendesk service hook subscription created

Using the Zendesk application
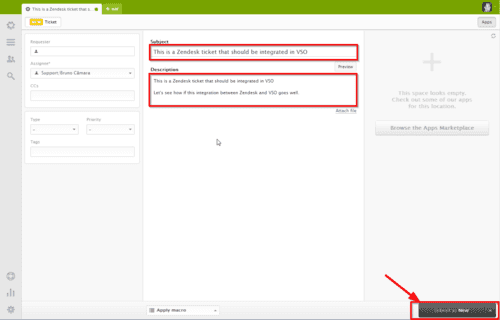
The VSO App for Zendesk is only activated in a Ticket side bar. Let’s start by creating a new ticket and submit it.
Go to the details page of the ticket just created and you should see the app in the sidebar. The first time the app is loaded it will ask the agent for his VSO alternate credentials (this gives you full auditability capabilities since the work item will be created in VSO with the agent’s account).
If you don’t know how to enable/set alternate credentials you can read more about it on this Buck Hodges blog post
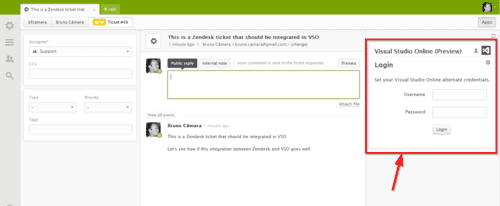
Fill in the agent Visual Studio Online alternate credentials and click Login.
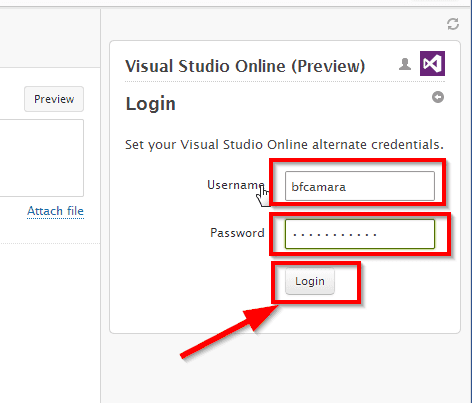
You should get a success notification.
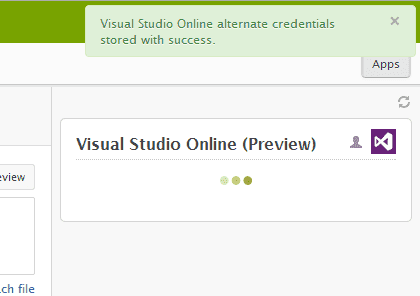
Since the ticket is not yet associated with a work item, you obviously don’t see the work item, but you can now see the actions that will allow you to create a work item associated with the ticket.
New work item
Now let’s create a work item from a ticket. In the ticket details page, click in New work item button.
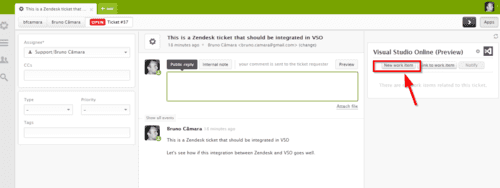
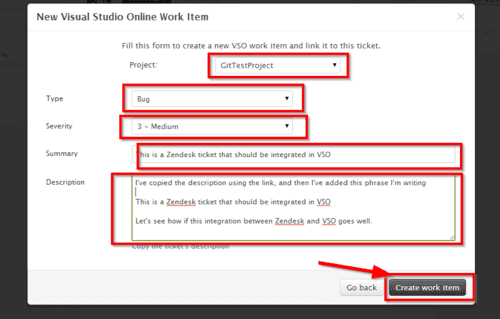
The app will open a modal dialog in a loading state while is fetching some data from VSO, and then will show the following form
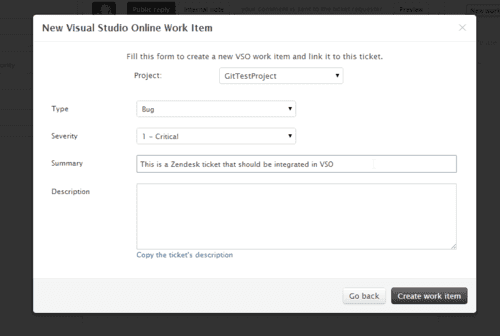
Fill in the form fields and click Create work item button (the fields should be self-explanatory).
Notice you can choose the work item type; the available work item types depend on the process template where the work item is being created.
The summary is pre filled from the ticket title, but you can change it if you want.
The description is not pre filled, but you can copy the ticket description, by clicking on the link “Copy the ticket’s description”
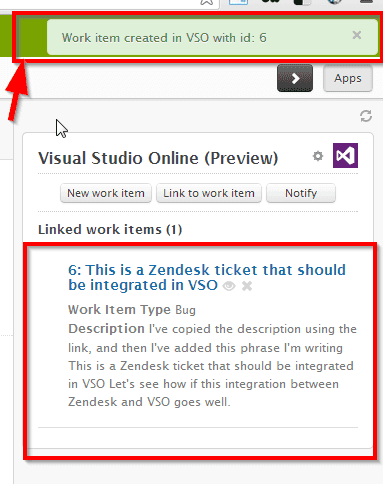
While the operation is being performed you should see a waiting spinner, and when completed, you will be notified and the work item is now visible as being linked
If you click on the work item title in the sidebar, a new window will be opened in VSO with the work item details. Click on it to the work item in VSO side. You will be able to see how the work item has been created correctly (Id, title, description, work item type, tag and link).
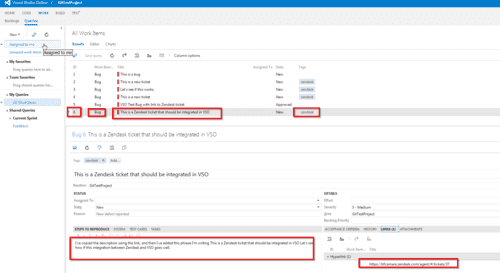
Notice the link to the ticket on the Links tab. This not only allows the Service Hook to determine the association between the work item and the ticket, but it will easily allow the developers to go directly to the ticket Zendesk if they wish too.
Remember, if you delete this link comments made on the work item (using the keyword) will NOT be propagated to Zendesk.
Comment work item in Visual Studio Online
For the work item just created, let’s make a comment in Visual Studio Online

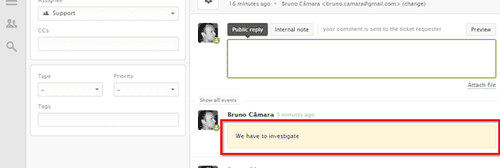
Notice that we started our comment with Zendesk: which means that the subscription will integrate this comment in Zendesk (this was previously configured in the Service Hook configuration, if you used a different pattern then use it accordingly). Go to your Zendesk app and open the ticket, you can now check the new comment is there
View work item details
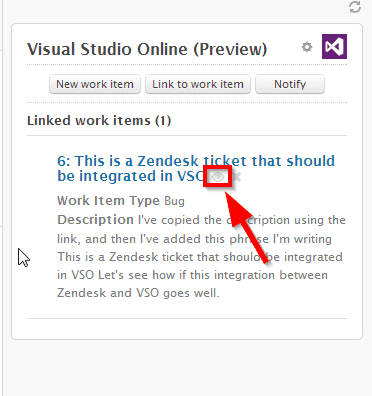
You can view the work item by click on Eye icon.
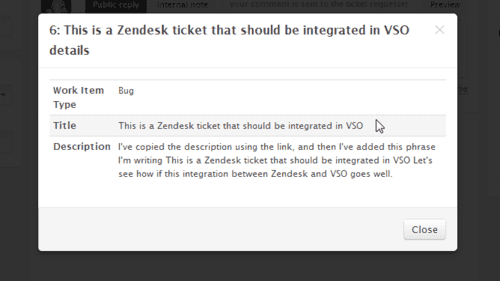
This will pop up a modal window that will allow you to see a work item a detailed view without leaving Zendesk
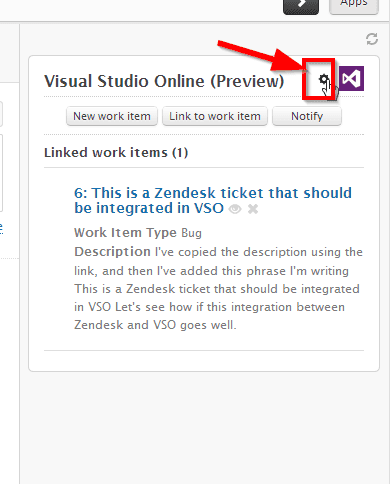
You can customize the fields visible in the summary view and the detailed view by clicking on the Cog icon.
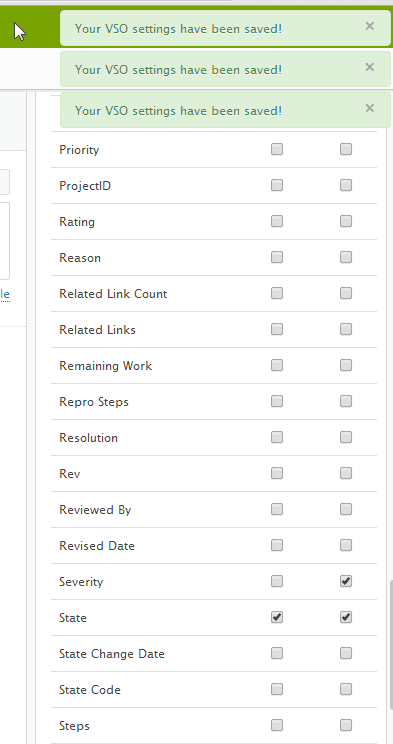
You should see the following page
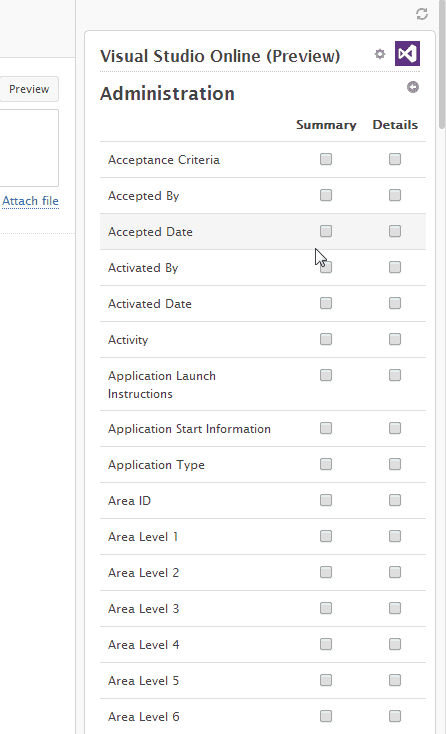
Here we can choose the fields shown in the summary and the details page. As you start changing your selection, the settings are automatically saved. Let’s add the State to the Summary page and the State and the Severity to Details page.
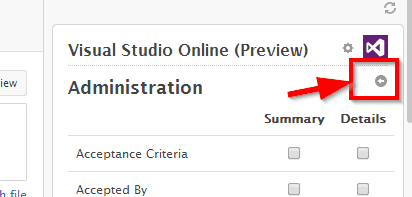
And now let’s return to the summary page, clicking on the back button.
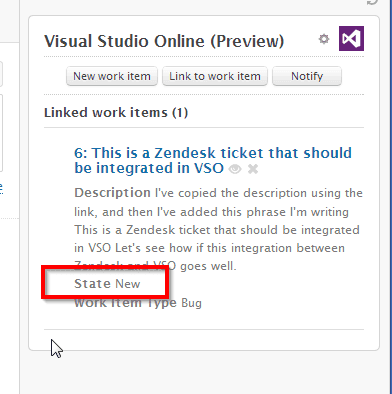
You should now see the State field
And click again in the eye icon to check the details page and see the State and Severity fields.
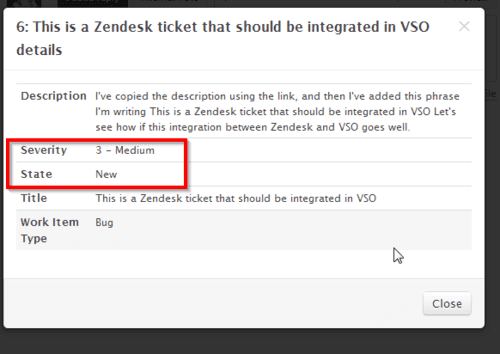
To summarize, the summary view is what you get in the sidebar and the detail view is what you view (in a modal window) if you want to see a more detailed view of the work item. This allows you to show the most relevant fields to your agents without the need to ever leave Zendesk
Link to work item
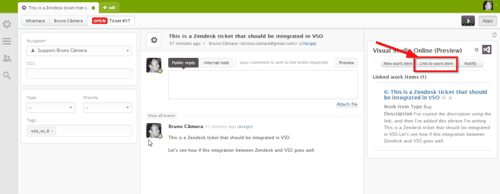
Instead of creating a new work item, we can choose to link the ticket to an existent work item. Click on button Link to work item.
You should see the dialog below
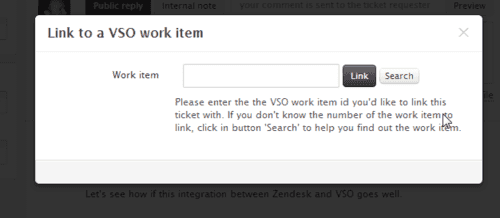
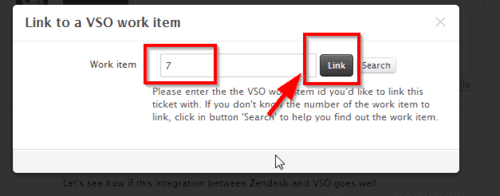
If you know the work item number, just enter it in the Work item text box and click Link. Otherwise you can click Search to execute a VSO work item query.
I will notice you can now see new section called Search that allows you to select the team project and the query to execute (this is the list of queries stored on the team project)
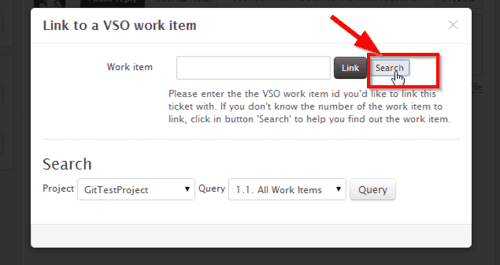
Choose the query you want to execute and click on Query.
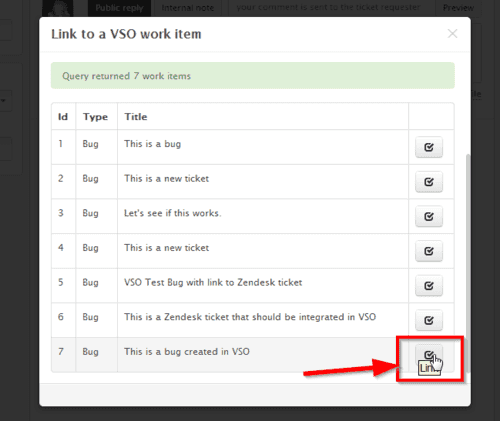
Click the Link icon of the row you want to select and its work item id should be copied to the text box. Now you can click the Link button.
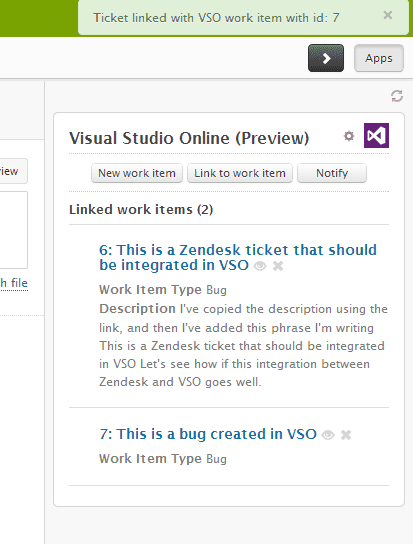
While performing the operation you should see a spinner loading, when the operation is completed you should be notified and see the work item in the list of linked work items.
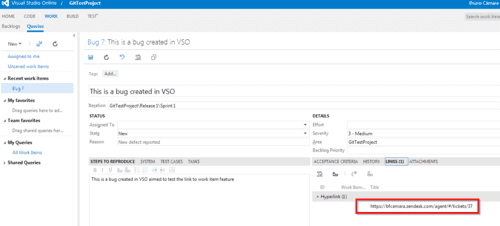
Let’s check how the work item was updated in VSO. As a result of the linking process, the work item should have been updated with a hyperlink with the ticket URL.
Notify
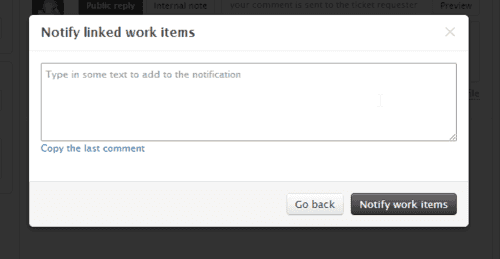
A Zendesk user can send a notification to all the linked work items. This will result in the addition of a comment to all linked work item(s). To notify linked work items click on Notify button.
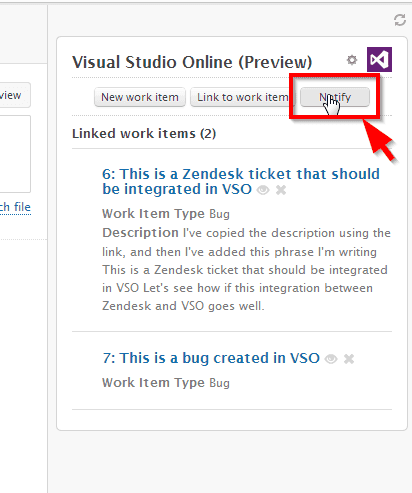
You should see the following dialog
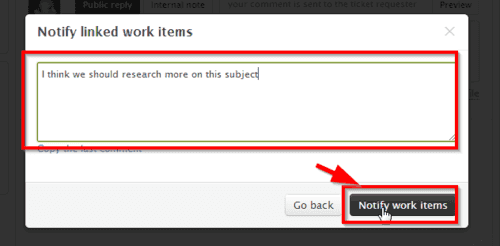
Fill in the notification and click Notify work items.
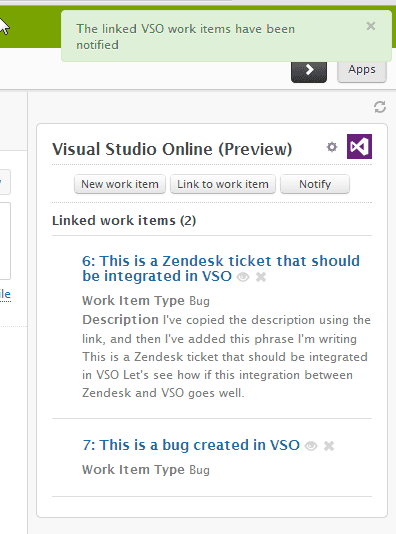
We can now check on VSO the new added comment.
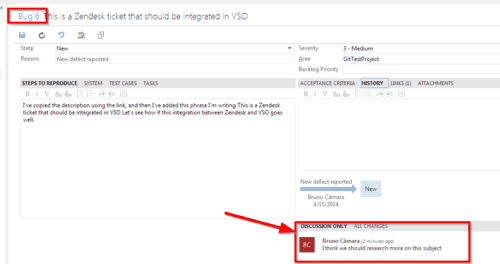
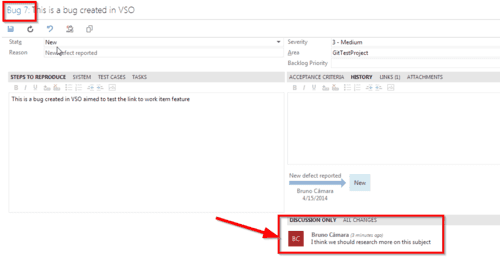
Unlink work item
You can also unlink a linked work item, by clicking on the Cross icon.
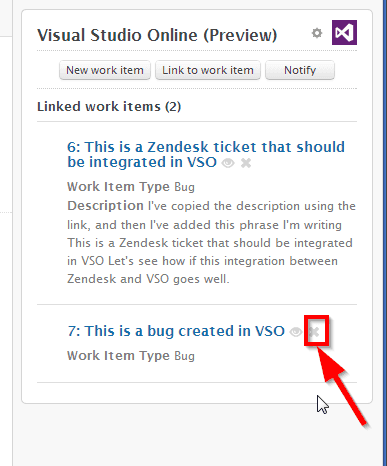
You need to confirm the operation.
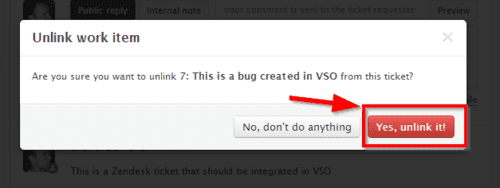
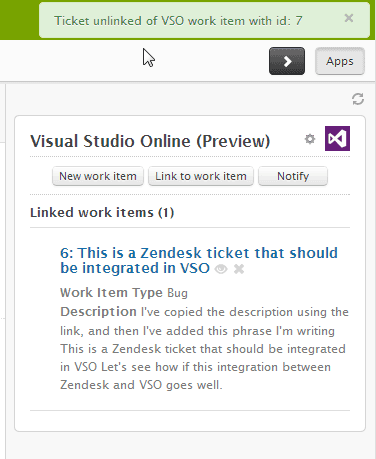
Click ‘Yes, unlink it’ and you should see a spinner while performing the action, you will be notified when the operation is completed.
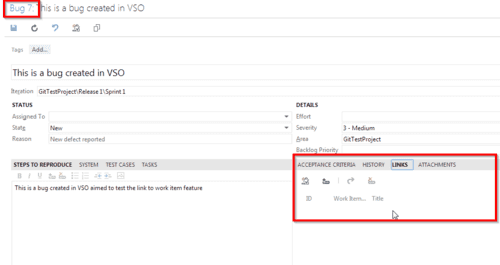
If you now see the work item in VSO, you will notice the tag and the link to the ticket have been removed.
Conclusion
I believe this is a great example of what possibilities can be achieved with Visual Studio Online REST APIs and service hook integrations.
The Zendesk for Visual Studio Online application is an example of an implementation and a scenario, in which the collaboration between the development team and the support team is increased without going to great hoops, each using their own tools.
I’m really curious what kind of other scenarios people will implement with these new VSO functionalities.